
Below you will find a step-by-step (or should we say screen-by-screen) guide for setting up an email account in Microsoft Outlook on your Windows computer. These instructions work with various Outlook versions, as well as other operating systems – although some screenshots may look slightly different depending on your version and platform.
1. Open Outlook, go to File > Info, and click Add Account.

2. Select Manually configure server settings or additional server types, click Next.

3. Choose Internet E-Mail, and hit Next.

4. Fill in the fields:
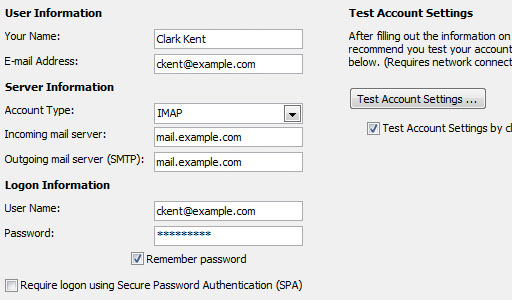
- Your Name: Enter your name as you want it to appear on your outbound email messages.
- E-mail Address: Type your email address.
- Account type is IMAP or POP3 (most people prefer IMAP as it leaves a copy of their e-mails on the server).
- Incoming Mail Server: mail.supremecluster.com
- Outgoing Mail Server: mail.supremecluster.com
- User Name: Enter your email address for the User Name.
- Password: Enter your email password.
Make sure the Secure Password Authentication is NOT ticked.
Once you have filled in all the information, click the More Settings button at the bottom right.
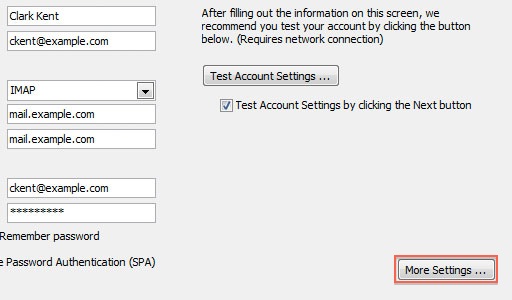
5. Go to Outgoing Server tab:

Tick the box next to My outgoing server (SMTP) requires authentication. Make sure you select Use same settings as incoming mail server.
6. Go to Advanced tab:
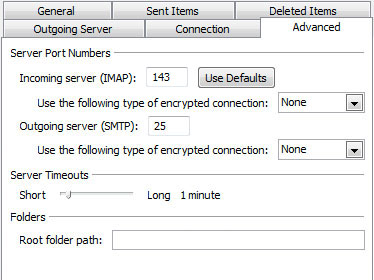
For IMAP (Incoming Server):
- Without SSL: Port 143, Encryption set to None
- With SSL (Recommended): Port 993, Encryption set to SSL/TLS
For POP3 (Incoming Server):
- Without SSL: Port 110, Encryption set to None
- With SSL (Recommended): Port 995, Encryption set to SSL/TLS
For SMTP (Outgoing Server):
- Without SSL: Port 25 or 2525, Encryption set to None
- With SSL (Recommended): Port 465 (SSL) or 587 (TLS), Encryption set to SSL/TLS
Make sure you save all changes!
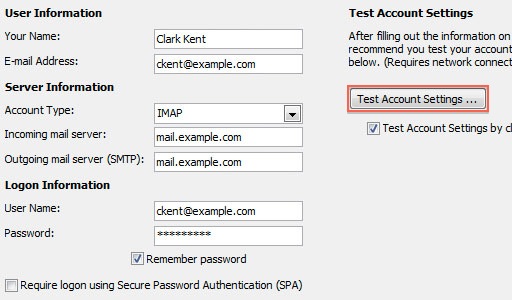
Back on the initial screen, make sure you test the settings to complete the setup.
Alternative Setup Methods
If the manual setup method seems complex, here are easier alternatives:
| Method | How It Works |
|---|---|
| Automatic Setup | Outlook may auto-discover your settings using just your email address and password. Try the “Add Account” wizard without manual configuration. |
| Webmail | Access your emails directly from your browser at the webmail URL provided by TrexHost. No setup required! |
| Mobile Setup | Download the Outlook app on your smartphone and sign in with your TrexHost email credentials. |
Need Help?
If you encounter any issues during setup, feel free to submit a support ticket from Help Center > My Tickets in your TrexHost control panel. Our support team is here to assist you!
🚀 Looking for reliable hosting with free professional email included?
Every TrexHost hosting plan comes with free email accounts – so you can create branded addresses like you@yourdomain.com at no extra cost. Enjoy blazing-fast NVMe SSD storage, 99.9% uptime, free SSL certificates, and 24/7 expert support – all at budget-friendly prices.
Whether you’re setting up Outlook, Thunderbird, Apple Mail, or any other email client, TrexHost makes email hosting simple, secure, and affordable.
👉 Ready to make the switch? Visit https://trexhost.com today!